
How to easily succeed in making high quality 3D scans!
Last updated on August 23rd, 2023 at 12:37 pm
Hello!
Are you looking to create high quality 3D scans without spending hours on it? I found tools that will allow you to create your first 3D models in no time.
I tested two really interesting photogrammetry software this week. Here is my feedback on both:
3DFlow 3DF Zephyr
VS
Reality Capture
A few years ago I did 3D scans with photos from my Android smartphone using Autodesk’s 123D Catch app which was really good but no longer exists since April 2017… Today there are many photogrammetry apps for mobile. I could only test Qlone, Scann3D and Trnio which allow quick captures, with great ease. The resolution of the renders is limited and for me it lacks advanced controls (in-app editing for example). However, the latter (Trnio) is really easy to use. That said, let’s get back to the topic ^^
The goal: quality + ease =)
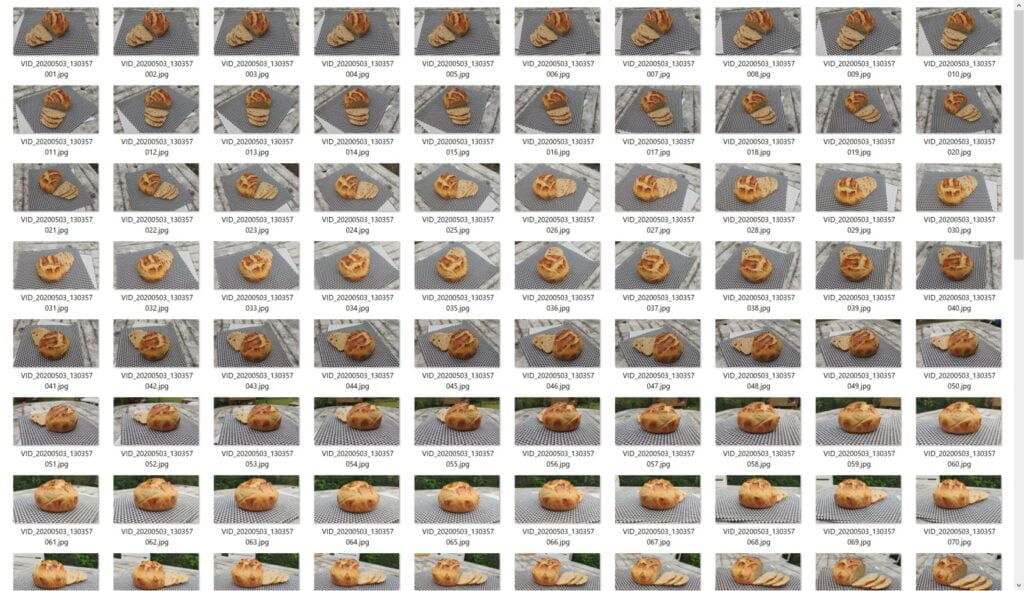
So I looked for a ‘better’ solution to use higher quality photos, a simplified process and qualitative results, in a minimum amount of time. For this test I chose our homemade bread (Thanks Linlin).
I first tried with a series of photos taken with my Sony DSLR (reflex camera) and then with my Xiaomi MI-9 phone (48Mp), in manual exposure to reduce light variations. Then I made a 4K video clip around the subject and, after transferring it to the computer, I extracted one image every half second to get 400 4K photos. This operation can be done automatically in both software programs. And using ‘only’ 4K images turns out to be sufficient and less processing intensive. The advantage of sticking with a DSLR photo shoot allows you to have multiple exposure levels (HDR) to get better texture generation, without ambient occlusion.
Here is a preview of the images:
If you don’t have a lighting studio, an overcast outdoor sky works very well. I chose a non-glossy, non-transparent subject for our test. For a non-matte subject, a matrix/laser scan would be preferable.
Let’s start with 3DF Zephyr:
Download the free version of the software that allows you to make 3D scans in one click and export your 3D file for free: https://www.3dflow.net/3df-zephyr-free/
The free version is limited to 50 source images. This is more than enough for a simple volume. For large environments or architectures you will definitely need the paid version.
Here is the result obtained with the default settings:
For this result I used 50 images, extracted from my 4K video clip. In terms of result, my goal is to produce a 3D file with a maximum of 50,000 polygons with a 4096 pixel texture in order to export it to the 3D content sharing platform Sketchfab.
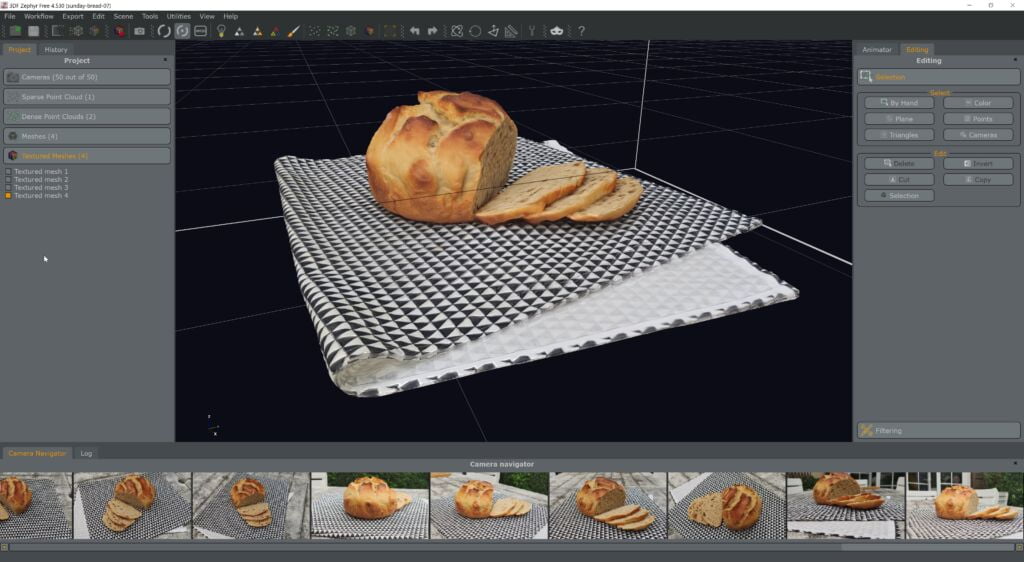
I also tried the other presets without getting optimal results, more details could lead to more imperfections. With more images, the result will definitely be more accurate.
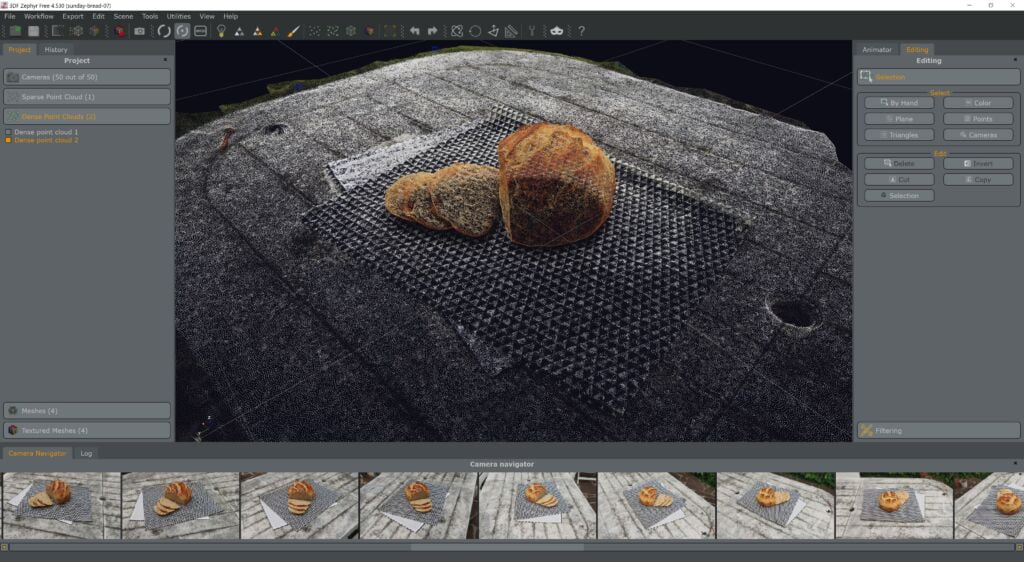
What I liked about 3DF Zephyr is the simplicity of the interface and step-by-step dialog boxes. There is even a feature that lets you drag and drop images to get the 3D model in one click! Also, the internal editing tools are very easy to use. Bonus: 3D mice are supported, very smooth for viewport navigation.
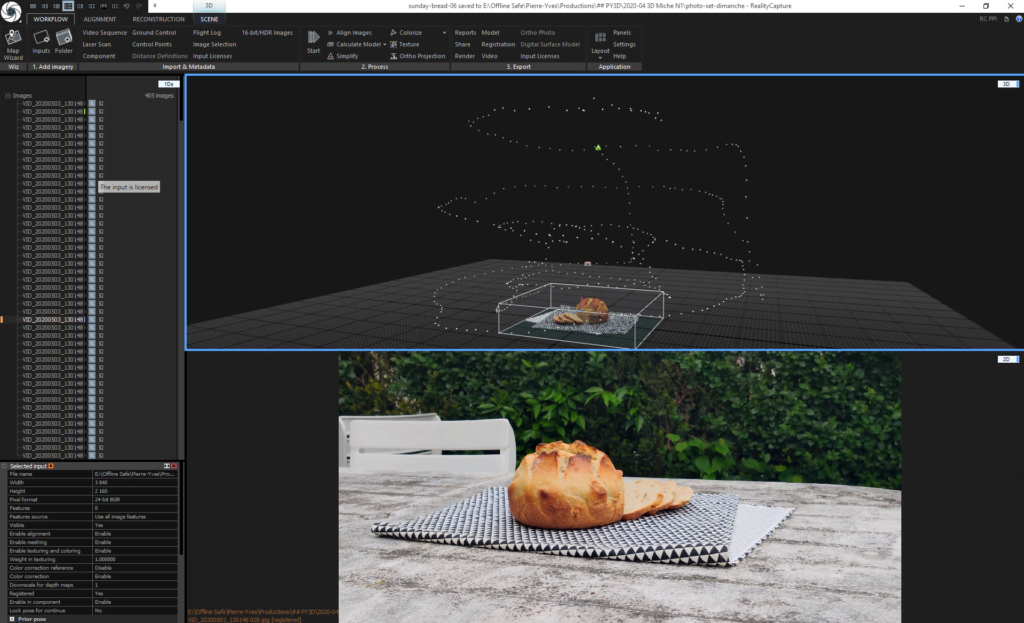
On the Reality Capture side:
I invite you to download the free version with a PPI (Pay Per Input) license which means you can use all the software features for free and you only pay when exporting your optimized 3D file. This is paid in the form of credits (minimum purchase of $20). In this case I had to pay $9 for the export, which is really not much. In addition, it is possible to make multiple changes and redo different exports, as long as we use the same source image ‘set’. ^^
Here is the result obtained by following the built-in tutorial:
In this second version, I was able to use the 400 images extracted from my 4K video clip because there is no limitation. However be careful not to use too many images because the processing ‘cost’ would increase. I also tried with 50 images and found that the 3D recognition accuracy was slightly higher than 3DS Zephyr’s, for an equivalent processing time.
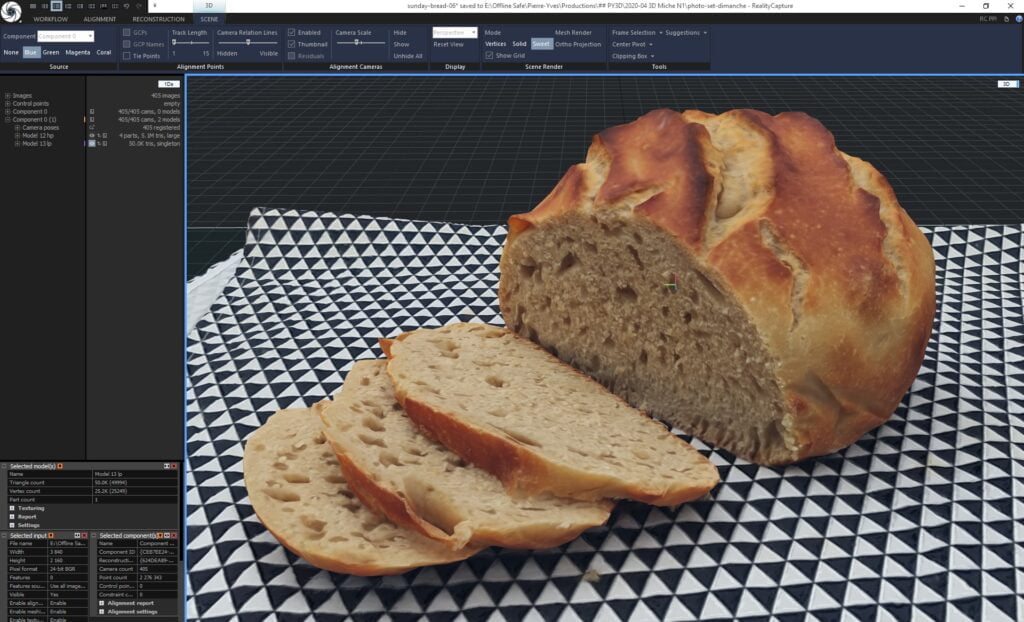
The interface is more complex and perhaps less intuitive, but the process is clearly identifiable. There are in my opinion many more possible adjustments to refine the result. The series of videos available in addition to the in-app tutorial allows you to get up to speed with its functions quickly. And it’s a wealth of good photogrammetry tips.
What I really appreciated about Reality Capture were the different customizable tools to refine surfaces, reduce polygon count, generate optimized texture layouts and especially generate normal maps on the ‘low-poly’ model from the ‘high-poly’ model. This preserves details, even on a simplified model exported for web display.
So that’s my feedback on these two very promising applications. I haven’t been able to test AgiSoft’s Metashape which seems to be an equally good competitor. If anyone uses it, feel free to leave your comments.
Eager to be able to do new scans. I hope I can test very soon with a drone to scan buildings. The results produced on these two software programs are impressive!
Cool bonus: native optimized model export from the software to Sketchfab. Without having to open other 3D software or the Sketchfab upload page ^^.
In terms of pricing: 3DF Zephir exists in different versions (advanced features), from €149 for the Lite version to €3,900 for the Aerial? version, and there are perpetual licenses with 1 year of support. For Reality Capture, in addition to the PPI license, you have monthly licenses from €249 to €750/month or a €15,000 perpetual license. Since photogrammetry is not my main activity, the basic versions suit me for now ^^.
I wanted to link the 2 pages for the video tutorials which are really well done for each of the two software programs:
https://support.capturingreality.com/hc/en-us/articles/360013467579-How-to-create-your-first-3D-model-RealityCapture-tutorial-Series
https://www.3dflow.net/technology/documents/3df-zephyr-tutorials/
If you liked this article, feel free to share it and leave your comment below, I’ll be happy to answer you.
Check out my other articles on the subject: